It is annoying to find that the grocery bags you have painstakingly organized in the trunk of your car have all split and made a mess. Fortunately for us, the 21st century is filled with innovations that make our lives a little easier—there are many DIY trunk organizer options that we can make ourselves.

Disclosure: Links to the products in this article are included where you can learn more about or buy each product. If you buy an item via the links on this page, we may earn a commission.
How to Make a Trunk Organizer
Basket Organizers
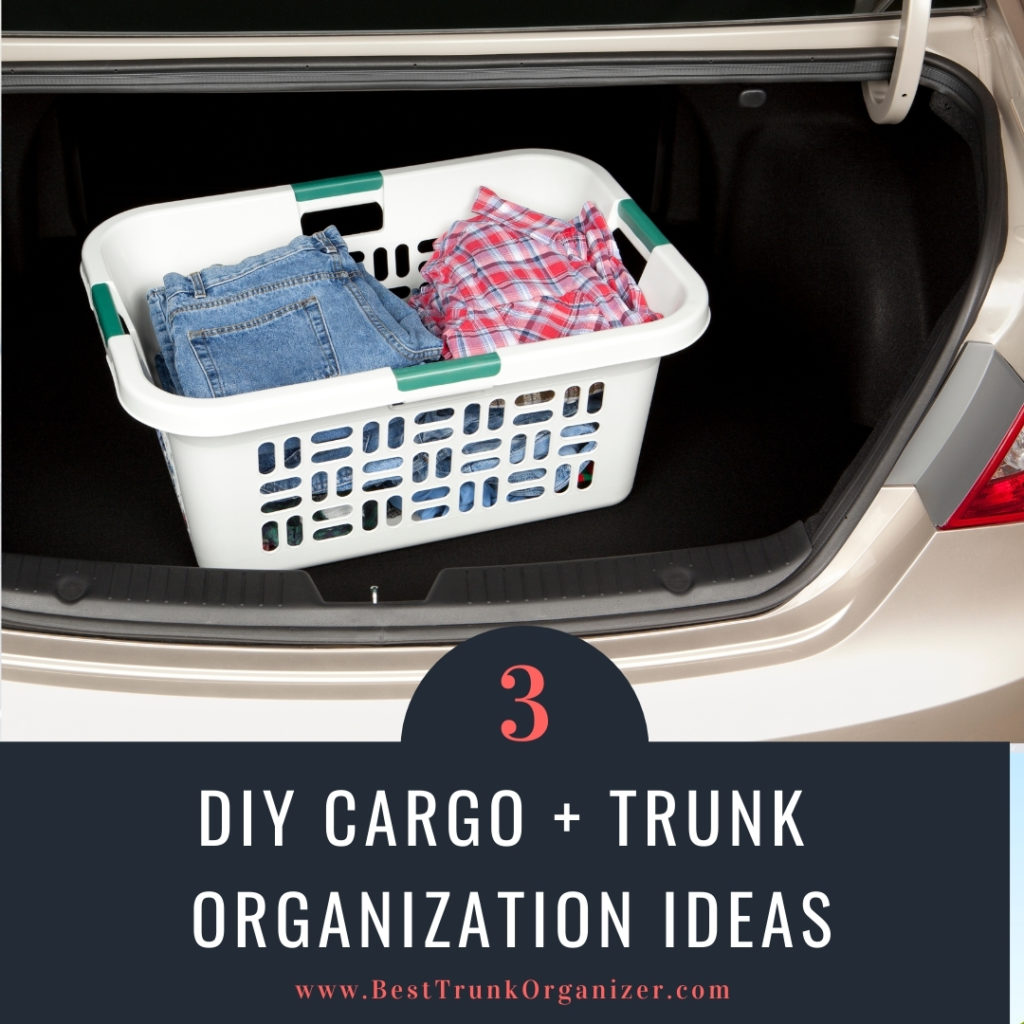
This is one of the simplest trunk organizers to make as it does not require any sewing, polishing, and cutting. All you have to do is look for a laundry basket, and place it in the trunk.
A laundry basket (or two) works really well to keep all your grocery bags contained after a big shopping trip. They fit nicely in the trunk of your car, the backseat of a sedan, or a SUV’s cargo hold. Then once your shopping trip is over, you can put the basket back in the laundry room.

This improvised custom trunk organizer also keeps items from falling or breaking while you are driving, especially when you made that sharp turn or when you suddenly stepped on the breaks. That’s just one of many reasons it’s good to know how to make a trunk organizer!
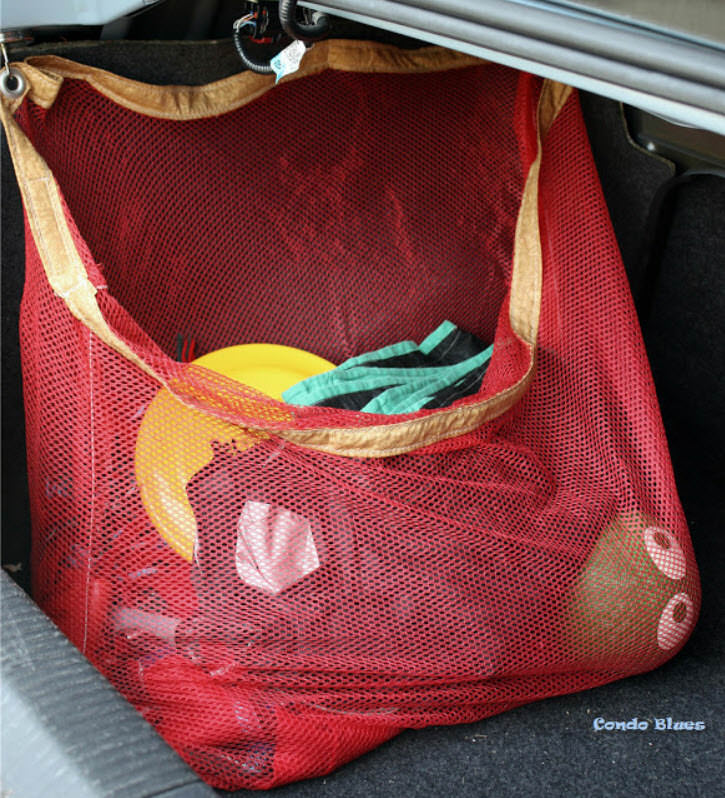
DIY Cargo Net Trunk Organizer
You can make two of these cargo net trunk organizers to sort items like shopping bags, toys, picnic blankets, and other items you keep in the trunk. You can remove them when you need more space and place it back when you need them again.

You Will Need:
• A laundry mesh bag
• An interfacing
• Iron and ironing board
• Thread
• Straight pins
• Sewing machine
• Large grommet kit
• Magnet kits
• Velcro hook tape
To begin, the drawstring of the laundry bag should be removed. Cut the horizontal side open from the closed end to the open end of the bag.
Measure the horizontal circumference opening of the bag, making sure to add 2 inches for seam allowance. This measurement is also used to measure the fabric and interfacing that is 4 inches wide. The lengthwise edges are to be folded on the right side to the back of the fabric. Iron them to make smooth edges.
Do the same on the opposite sides and iron it into place. This side will be the banding for the top of the cargo net trunk organizer. Use the straight pins to fix the banding around the top of the open mesh bag. Fix the top and bottom of the band into place by using the sewing machine.
Sew the open end of the laundry bag to close it, and set the grommet into the band of the bag with the grommet tool. To keep the trunk organizer in place, sew a piece of the hook side and loop tape to the back side of the fabric band, and hook it to the metal hooks attached to the metal sides of the trunk.
Homemade Trunk Organizer
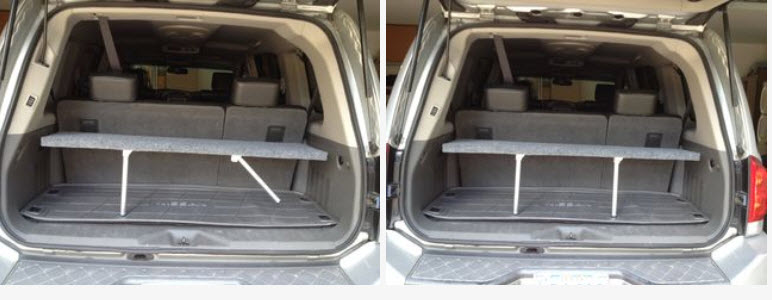
This is the most complicated one to make but simply follow the instructions, and you can have your very own homemade trunk organizer. This is especially convenient for people with SUVs with no built-in pop-up shelf.
Some SUVs may not be that spacious to fit most of your needed items. This trunk organizer provides more space—it also pops up when you need it, and folds away when you don’t.
The Materials You Need:
• Open wire closet shelf
• 2 legs of the style on boats with seats that fold down
• Auto-grade carpet in any color that matches car’s interior
• 8 zip ties
• 2 teacup hooks
• Needle and thread
• Hacksaw
• Scissors
Measure the shelf so that it has enough depth to hold large items and can be reached from the back seat of the vehicle, about an inch off the liftgate when the liftgate is closed. It should be high enough that it can fully hinge down against the back seat but low enough for the backseat to be its wall. Make sure the shelf is long for it to reach side to side in your vehicle.
The height should be measured in a way that it inclines to the front so the items won’t fall when you open the liftgate. Screw the teacup hooks into place at either end of the back seat to mount the shelf, which makes it easier to remove if you want to.
Pull it up and prop it using the legs, and position them as far away from the vehicle and each other so they can be easily folded, and fasten them tightly on the shelf using the zip ties.

To make the shelf look like it is a part of your car, cover it with the carpet. See how long you should cut the notches to fit the legs, and cut the notches on the short side of the carpet flap, so it wraps around the front edge. Clamp the carpet to hold the measured sides in place for it to be easier to sew. Tuck the flap of the leg bracket, and do not cut them.
Sew the carpet in place or glue it instead. Measure the circumference of the holes that will be lined up with hooks. Stitch around the edges of the holes and hang your pop-up shelf.
Summary
With your very own homemade DIY organizer, you will no longer have to worry about your groceries and other items falling over and making a mess while you’re driving.
These trunk organizers do not only make your trunk neat and tidy, but they also help in transporting your items in an easier way without walking numerous times to and from your car. They also provide more space in your trunk for other items. The best part is, they are not expensive, and you can make them at home yourself.
If after checking out these ideas, you’d still rather buy a trunk organizer from the store, check out our trunk organizer review page. There are plenty of options for every budget.
